Y6OS Access Control Configuration Notes
This page contains basic recommendations for configuring a controller, barrier, and access rule in YourSixOS. For hardware instructions, please consult the vendor’s hardware manuals and guides. Additionally, it is the installation partner’s responsibility to comply with all life safety codes.
Basic Steps for Access Control Setup
- Add Controller (Must be completed by the integrator)
- Add Barriers + Configure Barriers (Must be completed by the integrator)
- Add Barrier Groups
- Add Identities + Add credentials
- Add Identity Groups
- Add Access Schedules
- Add Access Rules
Please refer to the platform guides for more detail.
Controller
Permission Requirement: Integrator super admin and integrator admin
-
- Adding a controller is done in the same way as adding a camera or any other device. Once it’s added to the platform, a “barrier” section should appear on the device management page.
- Adding a device to YourSixOS: Adding a device video
Barrier
Permission Requirement: Integrator super admin and integrator admin
Monitor
-
- Closing Circuit (N/O): “Normally Open” and thus would “alarm” when the circuit is closed (Recommendation)
- Opening Circuit (N/C): “Normally Closed” and thus would “alarm” when the circuit is opened
REX type
-
- Recommendation: Depends on wiring. If your REX relay is wired/set-up to close upon activation, then choose Active low (N/O). This means that the REX closes its relay when it sees motion or is activated. (Not all REXs are motion based.)
Identities & Credentials
-
- Card info must be in hexadecimal format
Access Rules
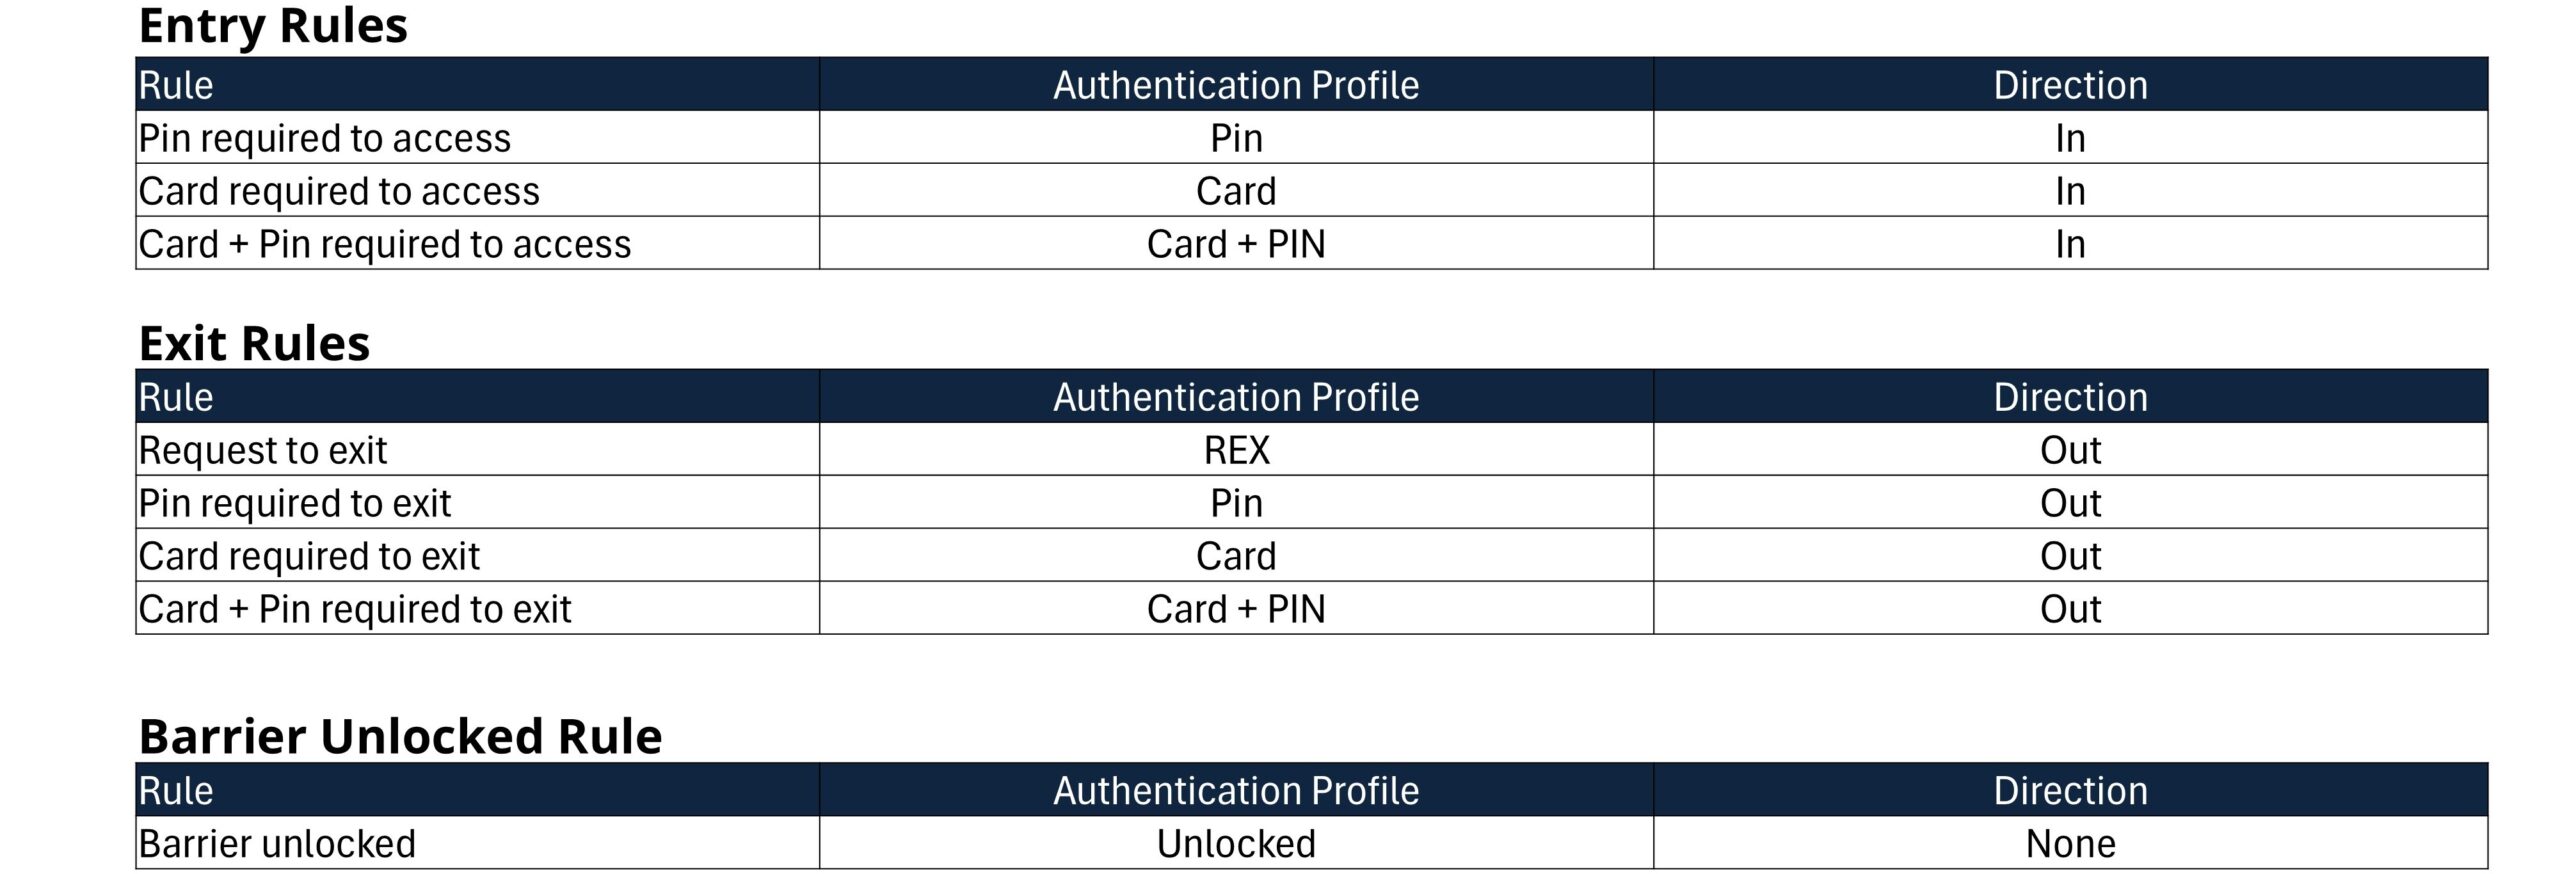
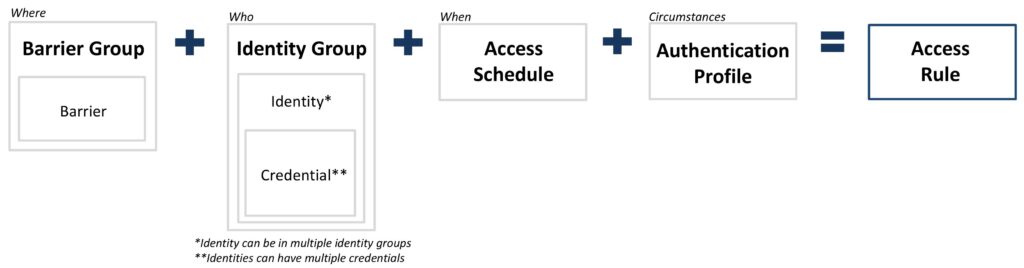
Who is permitted to enter, where, when, and under what circumstances.
Authentication Profile
For each authentication profile a unique rule needs to be configured. For example, if I want to use a card to enter and a REX to exit then you will have 2 access rules:
-
- Authentication Profile: Card Direction: In
- Authentication Profile: REX Direction: OUT
Access Rule Options